Topic: “Colonial Health”
I will give you assembly tips below, as well as time estimates!
Funny enough, or… not really FUNNY… but comical timing? We stumbled into this lesson the same week that Coronavirus caused our state to institute a mandatory quarantine. We joke that right now it FEELS like we are living in colonial times — our lifestyle is suddenly without many modern conveniences, and is highly localized. We’re cooking everything at home, making rare trips to the grocery store, and our horse mini-van is taking a {well deserved} nap.
Colonial health week here was full of real-life health lessons. We took some time to replenish our homemade elderberry syrup, a staple during cold/flu season in our home. And I finished my first-ever batch of fire cider, a natural sore throat/cough/congestion remedy which had just completed its required six weeks of fermentation. {If you are interested in those recipes, I’ll whip up a separate post. They tie in well to the units this week!}
OUR FAVORITE RESOURCES DURING WEEK 4:
- Young Ben Franklin PODCAST by Best Robot Ever
- Ben Franklin (PBS) documentary (suggested/scheduled in the Teacher’s Guide):
We started watching this week, snuggled up in my bedroom with our favorite soft blankets, and so far we are really enjoying it! It’s a mixture of acted-out drama and historian monologues. One thing I didn’t anticipate: it’s 3.5 hours long! We were able to source the DVD at our local library, but I can tell you it will take us several weeks and renewals to finish it. - Shopping for Colonial SEEDS from the suggested online resource in the Teacher’s Guide: it’s early spring here so seed purchasing is in full swing!
BUILD IT! TIPS FOR WEEK 4:
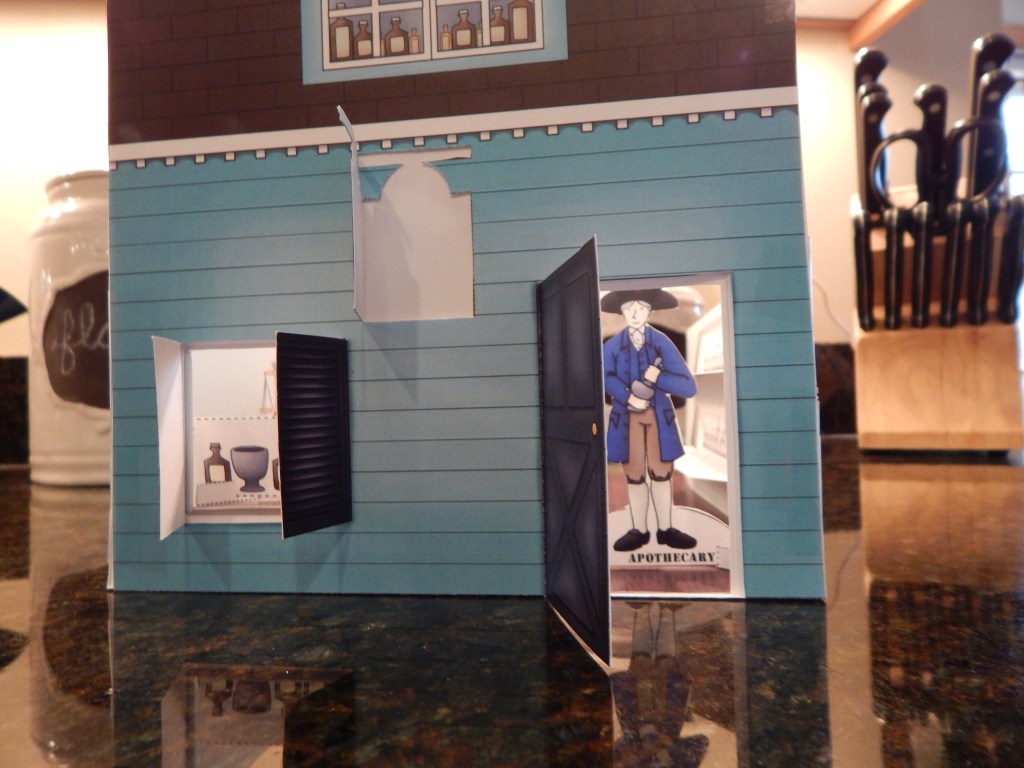
Since there aren’t directions in the Build It! kit for the Apothecary Shop, I thought I’d spend a little time lending a helping hand here. Just in case it blesses someone! Full disclosure: I’m not sure if my final model is “perfectly correct” (as in: how its creator intended it), but the kids and I are pleased with how it turned out and that’s what matters. If you need some visuals this week to assist your model building: I’m your girl! Follow along with me below!
TOTAL TIME ESTIMATE FOR BUILDING THIS WEEK: 1 HOUR 30 MINUTES.
(Town Square 10 mins + Apothecary 40 mins + Barber Shop 40 mins + omitting Coffinmaker)
Week Four assigns one building per day, for a total of FOUR projects. The “Town Square” is very simple… it took us about 10 minutes. We chose to skip the Coffinmaker/Mortician’s building b/c the kids voted it out, and frankly: we’ll still have PLENTY of buildings in the end. That left only (2) paper buildings for us to assemble this week: the Apothecary and the Barber Shop.
THINGS TO DO WHILE YOUR *KIDS* ARE CUTTING: You could read the coordinating pages from My American Story aloud to them, listen to the Young Ben Franklin podcast (see above), or continue reading aloud your chosen Adventure Reading selection.
THINGS FOR YOUR KIDS TO DO WHILE *YOU* ARE CUTTING: It’s *okay* for you to help your children cut. Some of the cuts are fairly intricate, and many cuts work best with an Xacto knife. If you are helping cut, you could have them read their assigned pages from My American Story aloud to YOU, or have them work on their American Story Journal pages.
Okay, ready for those building tips?
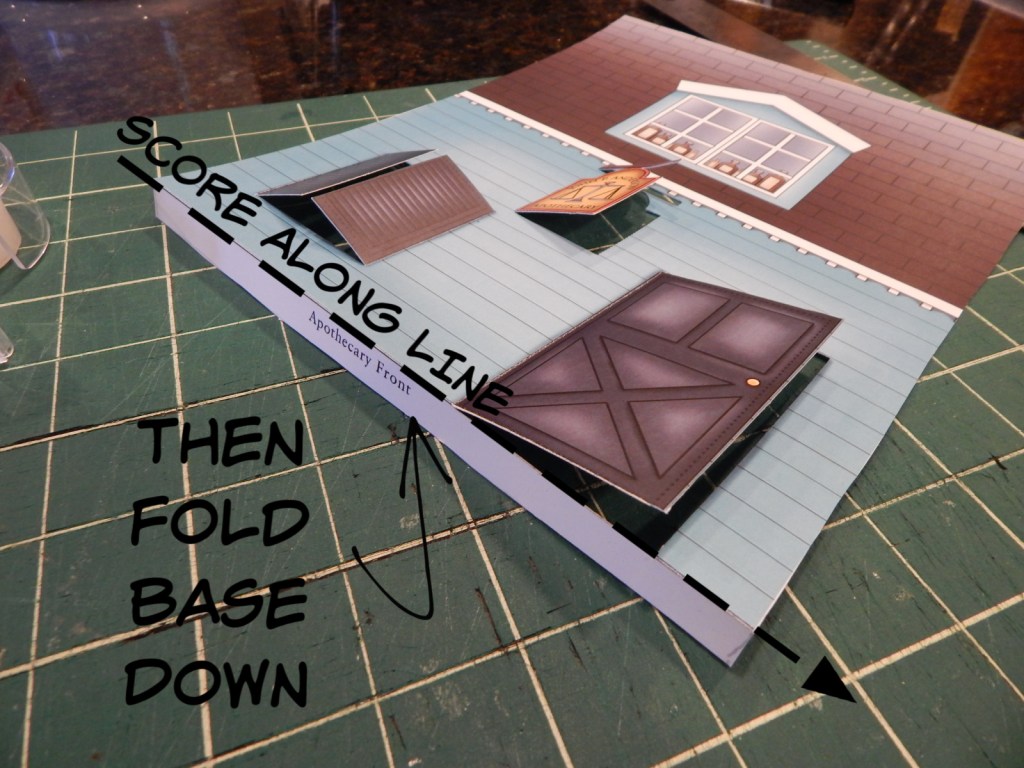
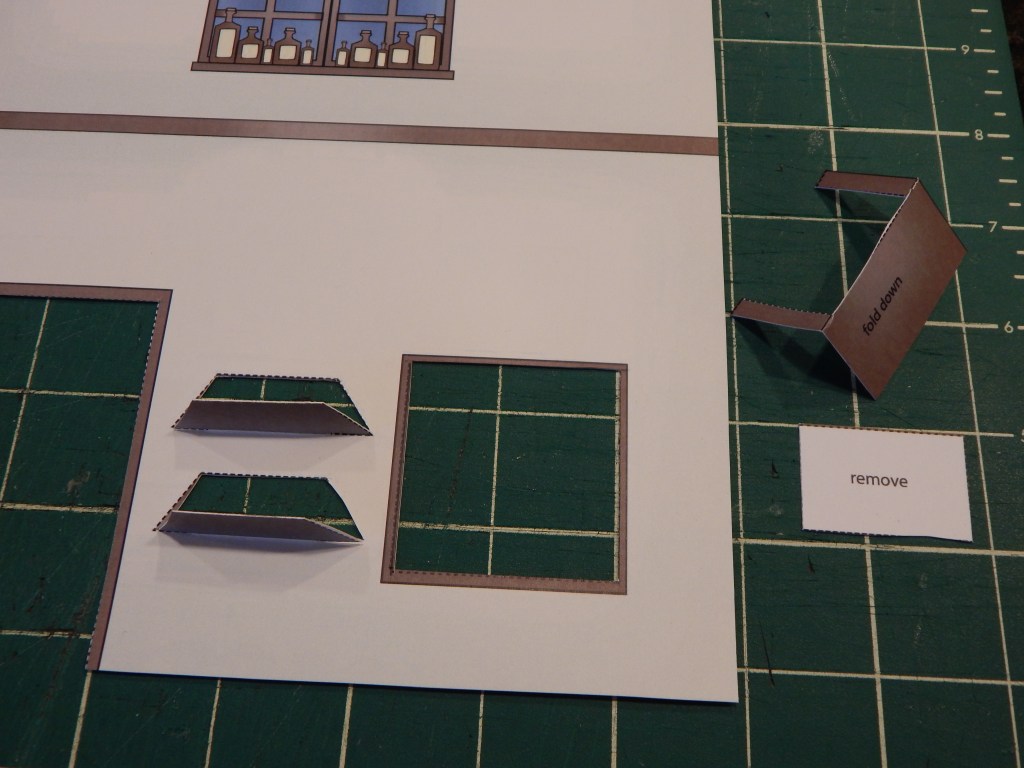
TIP #1: KEEP A BASE STRIP
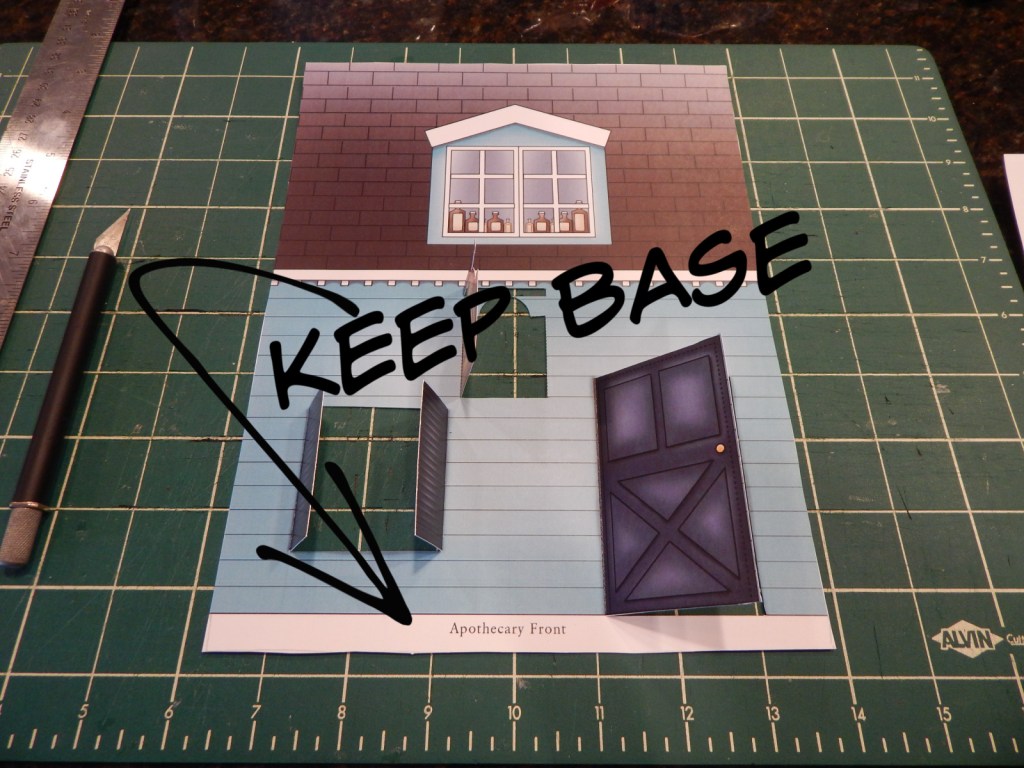
When you cut out the outer front and sides for the building, do NOT cut along the actual baseline–in other words, leave the label strip. Yes, the directions SAY to cut that base strip off. BUT: if you leave it, you’ll have two advantages: 1. you won’t forget which piece is which, and 2. it can be made into a tab that easily tapes/glues to the floor later. To make it into a tab: score along the solid line with the back of your Xacto blade, and fold it backward, like this:
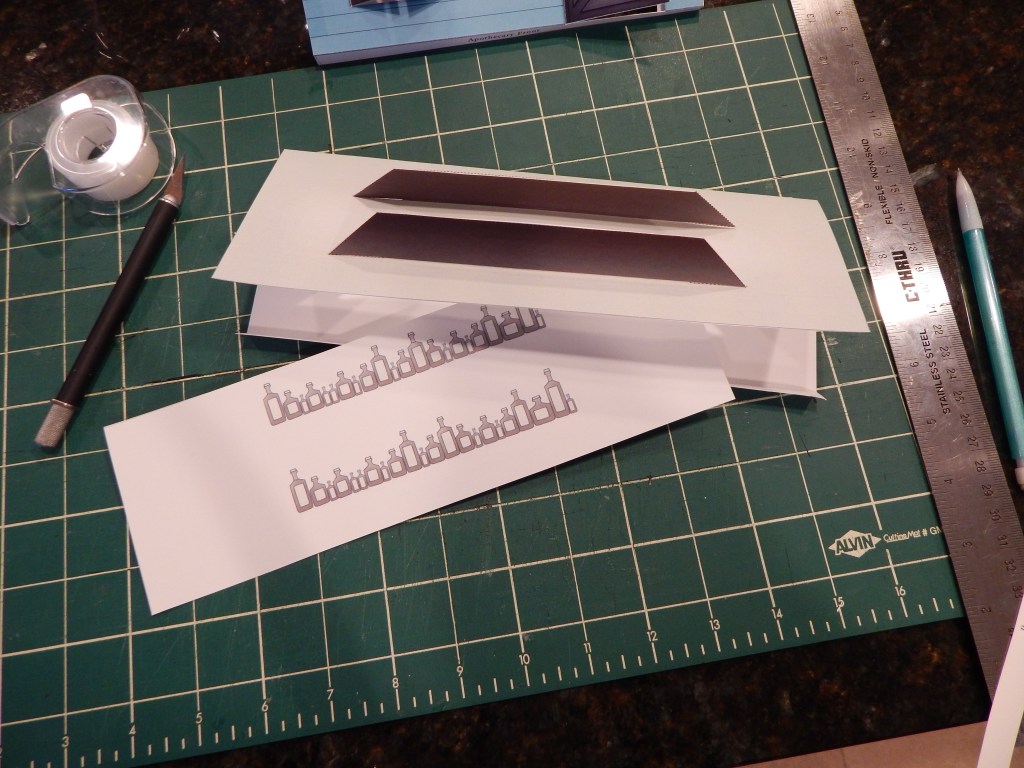
TIP #2: FRONT WALL “SANDWICH“
Next, we are going to make a SANDWICH using the three front wall pieces. Here we have:
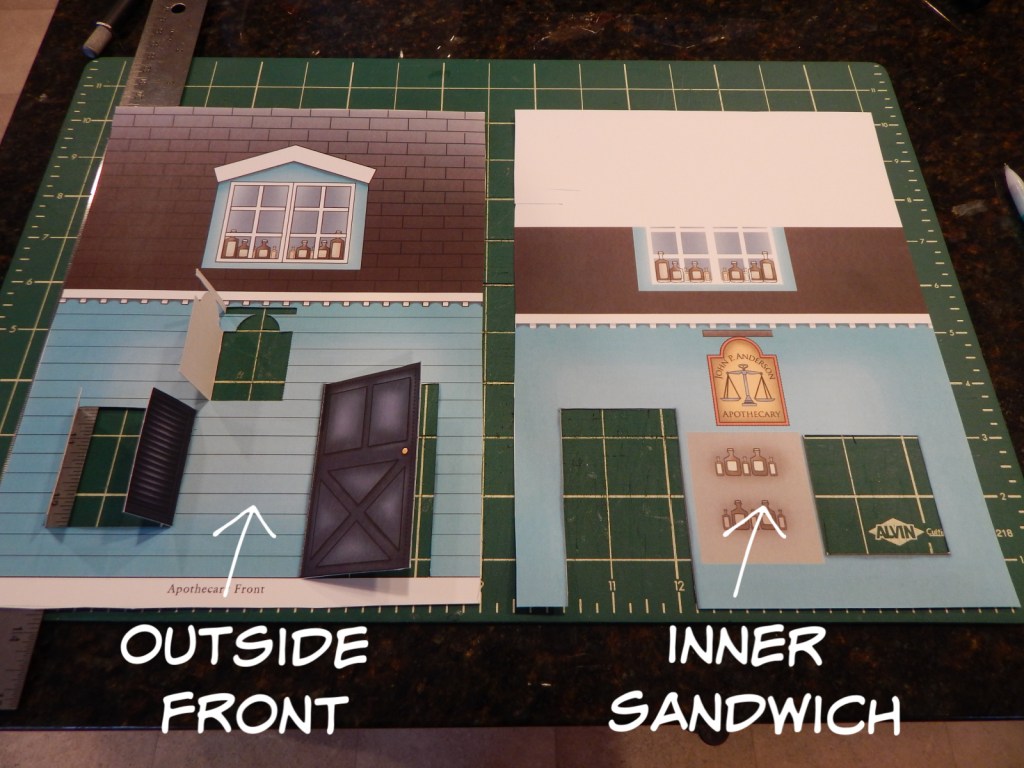
Flip the OUTSIDE FRONT over, so that it’s wrong-side-up, and place the INNER SANDWICH on top of it. Line up the doorway/window openings. Like this:
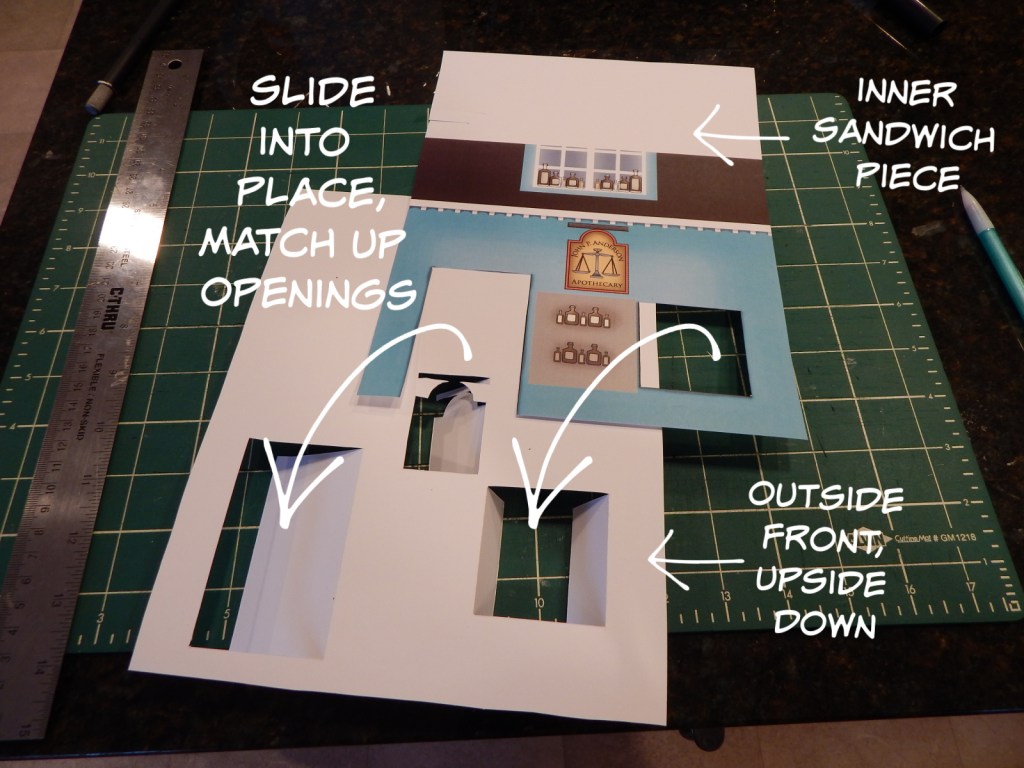
Great! Now we have the front and inner parts of our sandwich assembled. Tape those in place. Next, we’re going to add the back of the sandwich, which will be the part we SEE when we look at the INSIDE of our apothecary shop. (The inner sandwich we just taped on will be hidden between the two outer layers.) Like this:
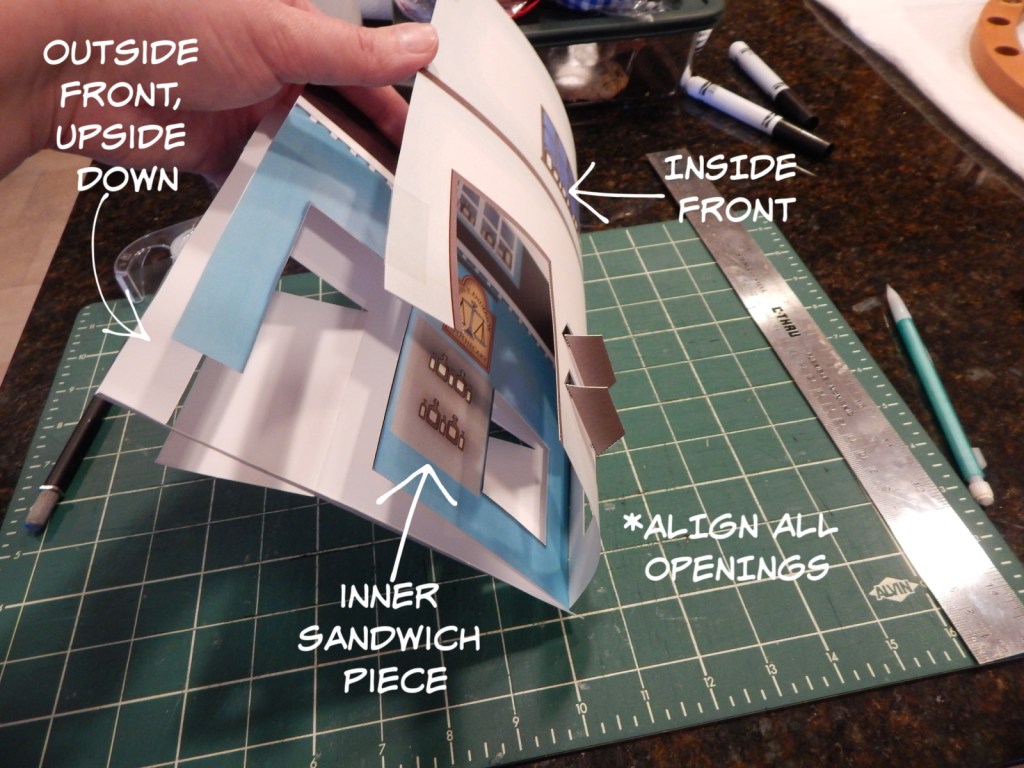
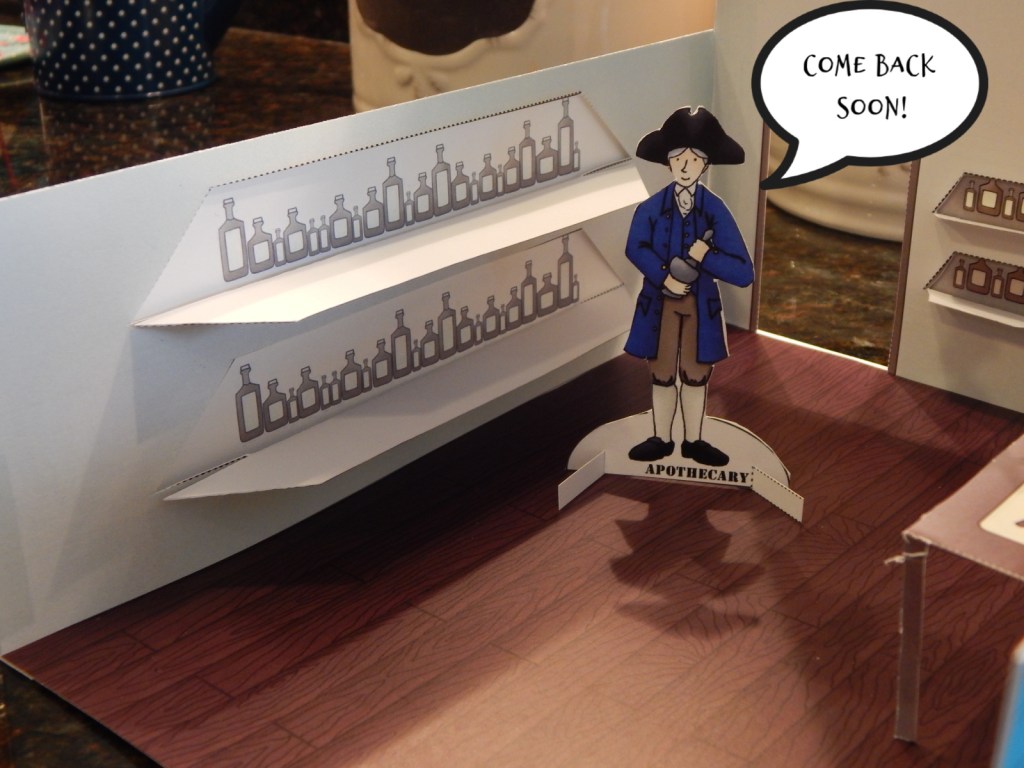
Tape all 3 layers together, and YAY! Front wall complete! If you’ve assembled it correctly, now you should see the bottles showing through the shelf openings. It should look like this:
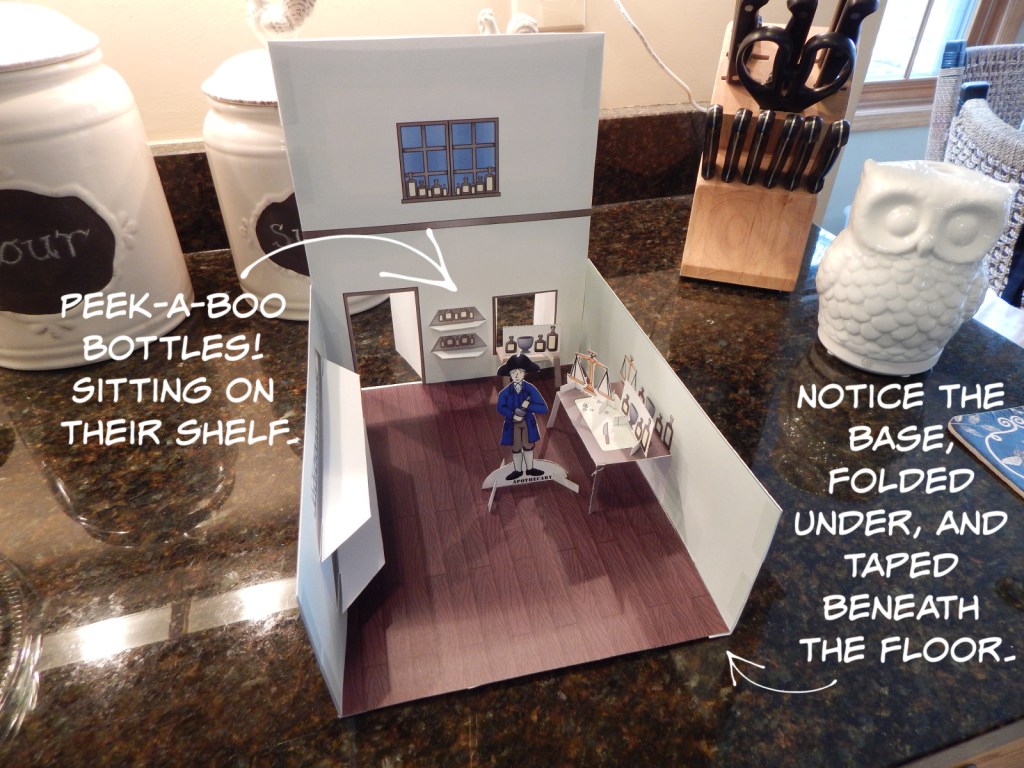
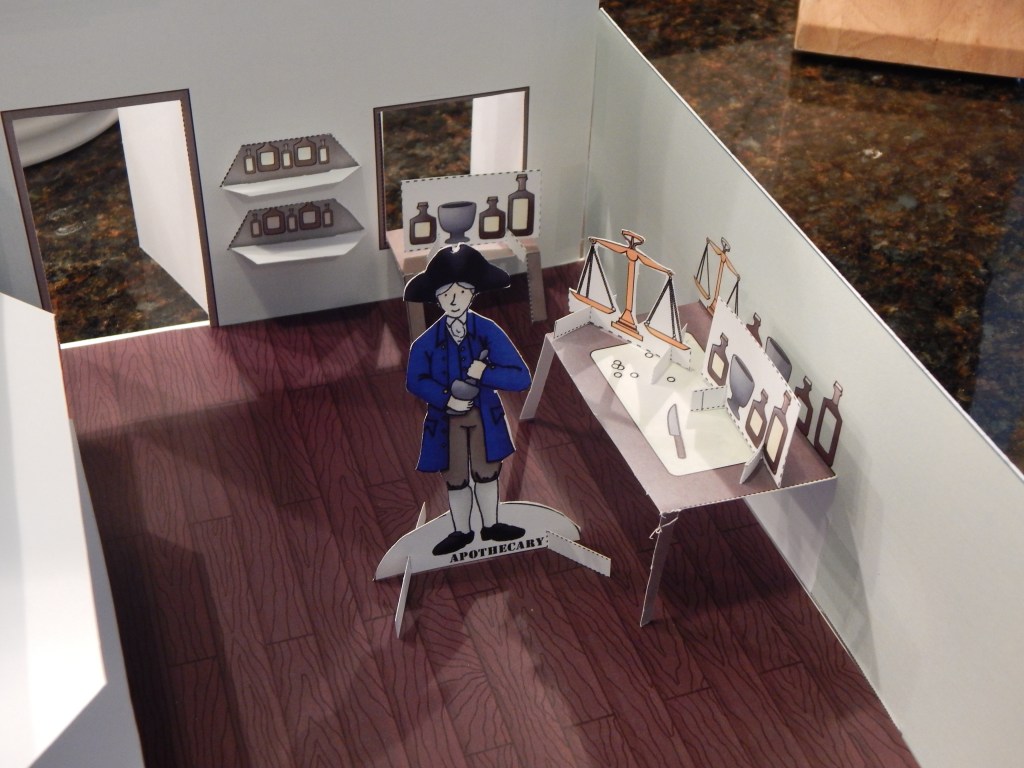
If you look closely you will see how I attach the walls to the floor. See tip #1 above for the base strip trick (scored and folded under). I just slide that folded strip under the floor piece and tape it in place. It helps add strength to the structure. Repeat for all three walls. The building is designed to only have THREE walls, like a dollhouse, so that students can easily access and play with the interior. My third grader LOVES to play with all the little parts and pieces, and rearrange the town. The outside of the building will look like this:
Note: the side walls are also made using this sandwich technique. The ‘bottles’ slide between the inner and outer walls:
TIP #3: CUTTING THE SHELVES
I saved this for last because I thought it might be easier to understand how the shelves work after first seeing the “sandwich” fully assembled. (As you saw above, the walls with shelves have a coordinating inner sandwich piece that makes it look like there are bottles sitting on each shelf.) The photo below shows the interior front wall piece by itself. To create the shelf openings I cut on the dotted lines, leaving most of their bottom attached, and simply folded them down to make a protruding shelf ledge. The window opening on the right is fully cut out, and the portion cut-away is folded into a table as shown. The short little table fits perfectly beneath the window. For support, tape the legless side to the base of the window.
I hope those few tips are useful! The BuildIt! resource contains directions for assembling the Barber shop. Blessings on your model making adventures!
WEEK 4 ERRORS, TIPS, AND TRICKS:
- TIP: If you are using the Colonial Comics books, you may just want to preview/flip through stories before handing them to your child. One of the stories titled “Maverick Island” in Book I: New England 1620-1750, involves rape. Other stories are quite heavy as well, brushing over topics such as hangings and be-headings. To be clear: I still feel it’s a GREAT history resource, and worth including! Especially for children who love graphic novels. I have been assigning my 6th grader a couple stories per week.
- TIP: A great story for this week from Colonial Comics Book II: New England 1750-1775 is “The Devil and Silence Dogood.” It’s about Ben Franklin as a youth.